

How Can I Move In Path Solidworks Animation
SOLIDWORKS animations are a great tool to evaluate and illustrate your models. While more advanced rendering programs like SOLIDWORKS Visualize can give you a highly polished product, a lot tin exist done inside a basic SOLIDWORKS blitheness to show off your piece of work.
In improver to previewing a blueprint's intended motion, animations can prove motion of a camera effectually and through the model, giving viewers a closer look at key details. For this latter process, a photographic camera sled is a tremendous asset. Camera sleds offer improved command over the motion of the camera in 3D space, utilizing assembly mating techniques standard to many SOLIDWORKS users.
Let's go through some important animation concepts and and so take a look at how to gear up and use camera sleds.
A Brief Overview of Animations
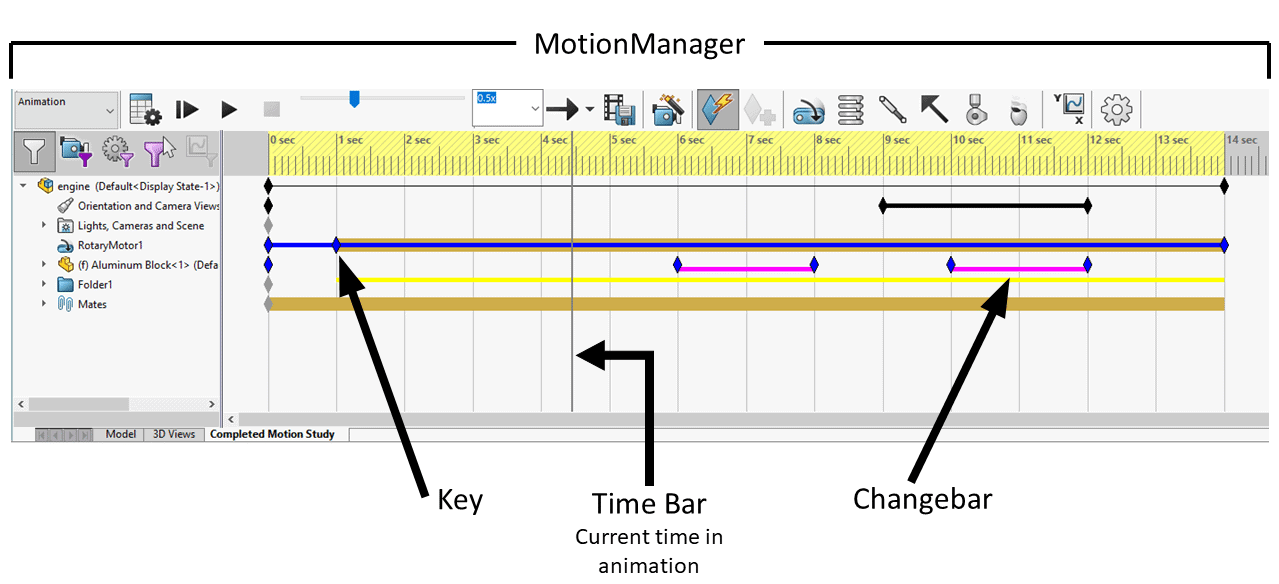
Animations in SOLIDWORKS are a simple grade of motion written report in which models tin exist moved without regard for physical characteristics or interactions (eastward.grand., weight, collisions). The animation is defined in an interface called the MotionManager, which includes a timeline illustrating the journey taken past each actor in the animation. You utilise "keys" to define moments in the timeline where something happens, such every bit an assembly component rotating 90°. SOLIDWORKS will calculate the position of the affected component at discrete frames in between these keys so that in that location is smooth motility from the starting signal to the cease. This transition between keys is shown in the timeline past a "changebar."
As I mentioned earlier, animations are non just limited to component motion. You can contain changes in advent or lighting with your keys, or, as I will prove hither, you lot can simply move a camera around a model to become a more complete view.
As you zoom, pan, and rotate, SOLIDWORKS can create keys automatically to store the resulting views in the animation. Simply like with component motility, SOLIDWORKS will interpolate the path taken by the camera from one key to the adjacent. This method makes it easy to capture simple transitions, especially if you simply desire to go between some of the default view orientations, just more than detailed paths are difficult to generate accurately. For those situations, nosotros have photographic camera sleds.
Photographic camera Sleds
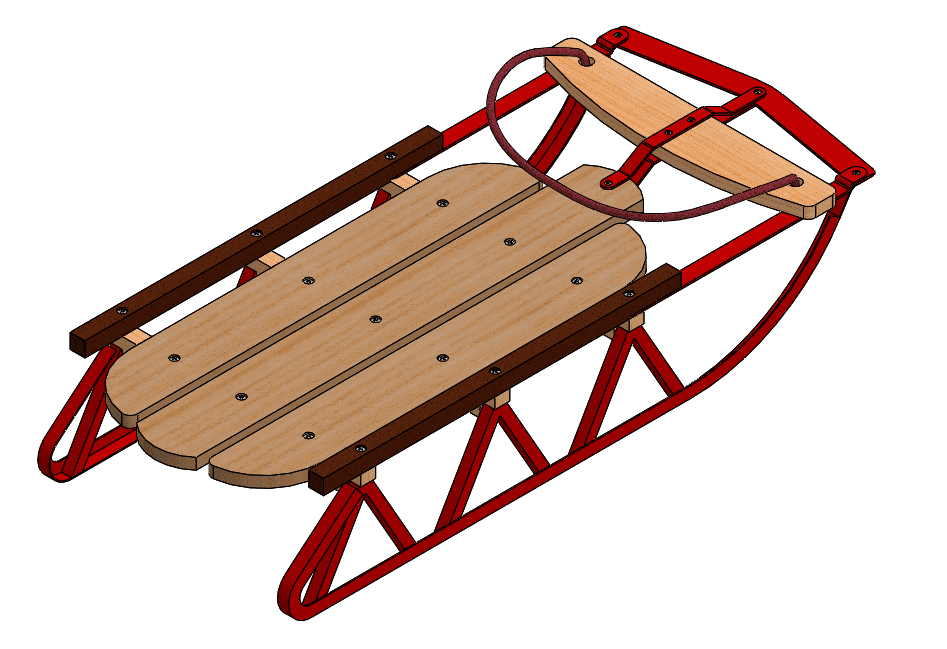
A camera sled is a moveable block added to an assembly—often as a virtual component—on which a camera is located. Yous can then motility the cake using standard mating techniques or animation tools to update the camera'due south position throughout the blitheness. I'll demonstrate here how a camera sled can exist used to animate—of form—a wooden sled.
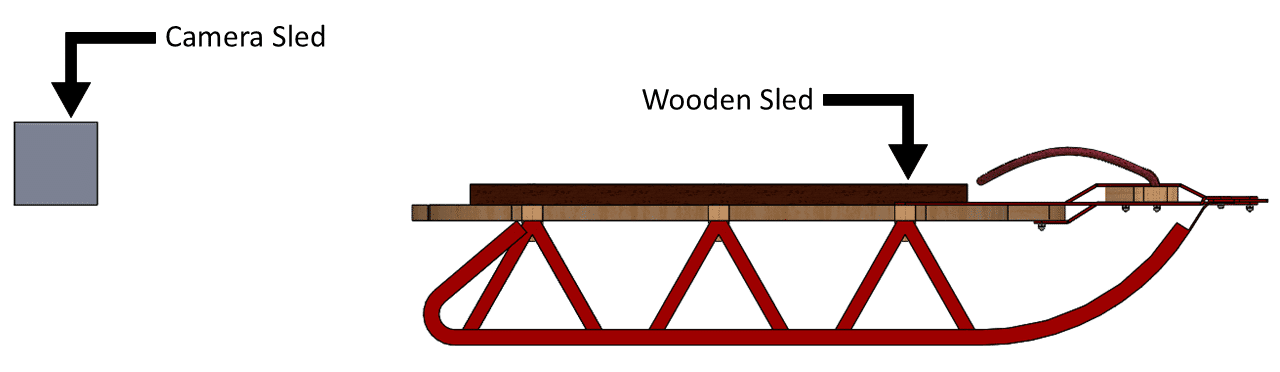
The starting time step to setting upwardly this animation is to build the camera sled as a virtual component inside the assembly. A uncomplicated extruded rectangle should be good enough. The size of the cake is non too important, as it will exist subconscious during the blitheness; putting information technology on a similar scale to the remainder of the assembly though can make it easier to visualize and position. When sketching the camera sled, I want to be careful not to add any references to other assembly components, every bit this might cause bug when I try moving information technology subsequently.
My virtual part has an InPlace mate locking information technology into position. I will delete this and mate the component using standard techniques, such as defining ii sets of ancillary faces so the block can nonetheless interpret in 1 direction. (Depending on how a virtual part was created, it might have a Fix relation instead of an InPlace mate. A Set relation can be undone past right-clicking the component and choosing Float.)
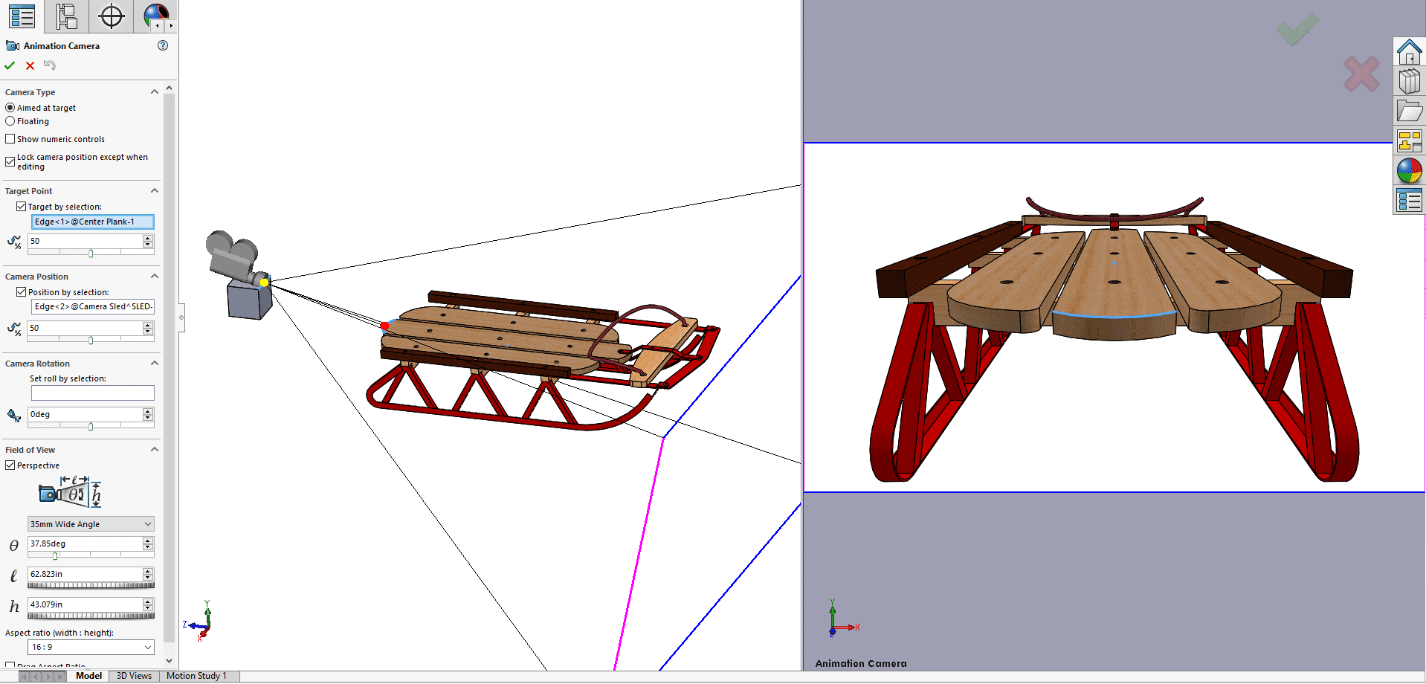
At present I need to create a camera for use in the blitheness, which can exist washed from the View > Lights and Cameras > Add Camera command. While defining a camera, SOLIDWORKS splits the graphics area into ii screens: on the left is the full model shown in the standard viewport, and on the right is the model shown from the perspective of the camera existence created. Zooming, panning, or rotating in the right screen changes the position and orientation of the photographic camera itself, which tin can be seen on the left screen.
Instead of locating the camera manually, I can use my photographic camera sled to position it. In the PropertyManager, the Position by pick pick lets me choice a slice of geometry to locate the camera. Information technology accepts faces, vertices, sketch geometry, and more. I volition cull an edge of the camera sled and so use the Pct distance along selected edge/line/bend slider to put the camera midway forth the line.
The target on which the camera focuses can too be defined using model geometry. (Alternatively, enabling the option to Show numeric controls would permit me specify the target using XYZ coordinates.) At the bottom of the PropertyManager, the Field of View settings ascertain the lens size. There are several standard lenses to cull from, though custom values are as well allowed.
The camera is added in the DisplayManager nether Scene, Lights, and Cameras. To encounter the model from the camera's perspective, I can right-click the camera and enable the Camera View pick.
Now I'll get into the animation. I tin create a new motion study from Insert > New Motion Study, or I can merely use the existing Motion Study i at the bottom of the SOLIDWORKS window. In the MotionManager, I'll make certain the study blazon on the far left is set up to Animation.
For this blitheness, I desire to simply gradually movement the photographic camera frontward to the front of the model. I have a Distance mate putting the camera sled 18" behind the wooden sled, so I will suppress that mate for the duration of the animation to allow translation in the global Z direction. I'll movement the timebar further ahead in the timeline and so click and elevate the block to the forepart of the wooden sled, creating a central automatically. In the animation, SOLIDWORKS will motility the camera sled at a abiding speed from its starting point to this ending signal.
The photographic camera can be found in the Lights, Cameras and Scene folder near the top of the blitheness characteristic tree. To view the blitheness from the camera'due south perspective, I can right-click the camera feature and choose Photographic camera View before hitting Play. If I manually motion the timebar after that, though, the default viewport returns. For a more permanent change, I will correct-click the Orientation and Camera Views key at the starting time of the timeline and turn on Camera View. As long as this option is enabled, the animation will be shown through the camera lens.
The photographic camera parameters tin can be redefined throughout the animation every bit desired. Right-clicking the photographic camera and selecting Properties brings back the camera's PropertyManager. If I arrange these settings, information technology will create a primal at the current position of the timebar to store the change. I will have the target change periodically so the camera sweeps from left to right as it travels down the wooden sled.
Once the animation is prepare, I will hibernate the camera sled to prevent it from appearing in playback. I just need to motility the timebar back to the offset of the blitheness, right-click the camera sled component, and choose Hide. This will brand it invisible for the full elapsing of the blitheness. I can and then click the Calculate button to make SOLIDWORKS solve each frame, and the blitheness will be ready for viewing.

A more than interesting awarding of the photographic camera sled, though, would exist to use it with a Path mate. I volition sketch out a track of sorts in the assembly to represent the desired path of the camera. With the camera sled mated to this path, I can create an blitheness in which the photographic camera gets pulled forth the loop while focusing on different areas of the wooden sled.
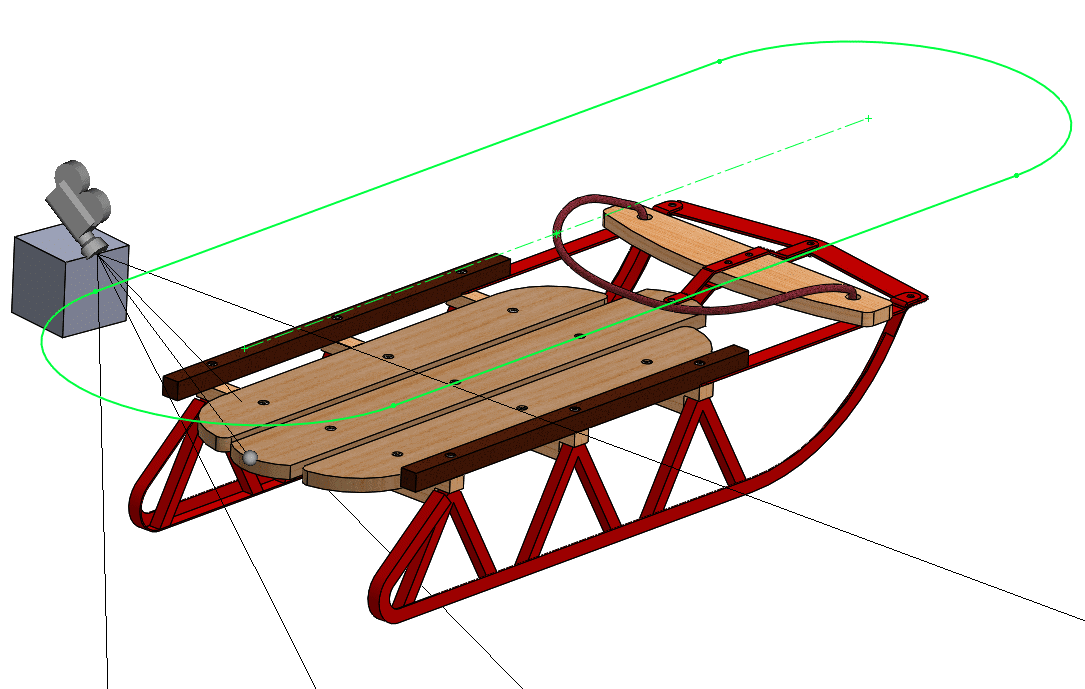
An important note about Path mates is that the Costless constraint cannot be used with an animation. Percent Along Path is easiest to piece of work with in this instance. The percent tin can be edited at unlike time steps, and then I will set it to 0% at the kickoff of the animation and to 100% at the end.
Equally was done before, I will redefine the camera'due south target every couple seconds to capture the desired views. The camera sled and path sketch can both be hidden for the course of the animation.

There are plenty of opportunities to apply camera sleds, so I promise this gives you some ideas for your ain projects. If you would similar to come across more animation tricks like these or have whatever other questions, experience gratis to reach out.
Anthony Sandri
Application Engineer
Computer Aided Engineering
Source: https://www.cati.com/blog/gone-sledding-using-camera-sleds-in-solidworks-animations/
Posted by: hansoneachich.blogspot.com
0 Response to "How Can I Move In Path Solidworks Animation"
Post a Comment